
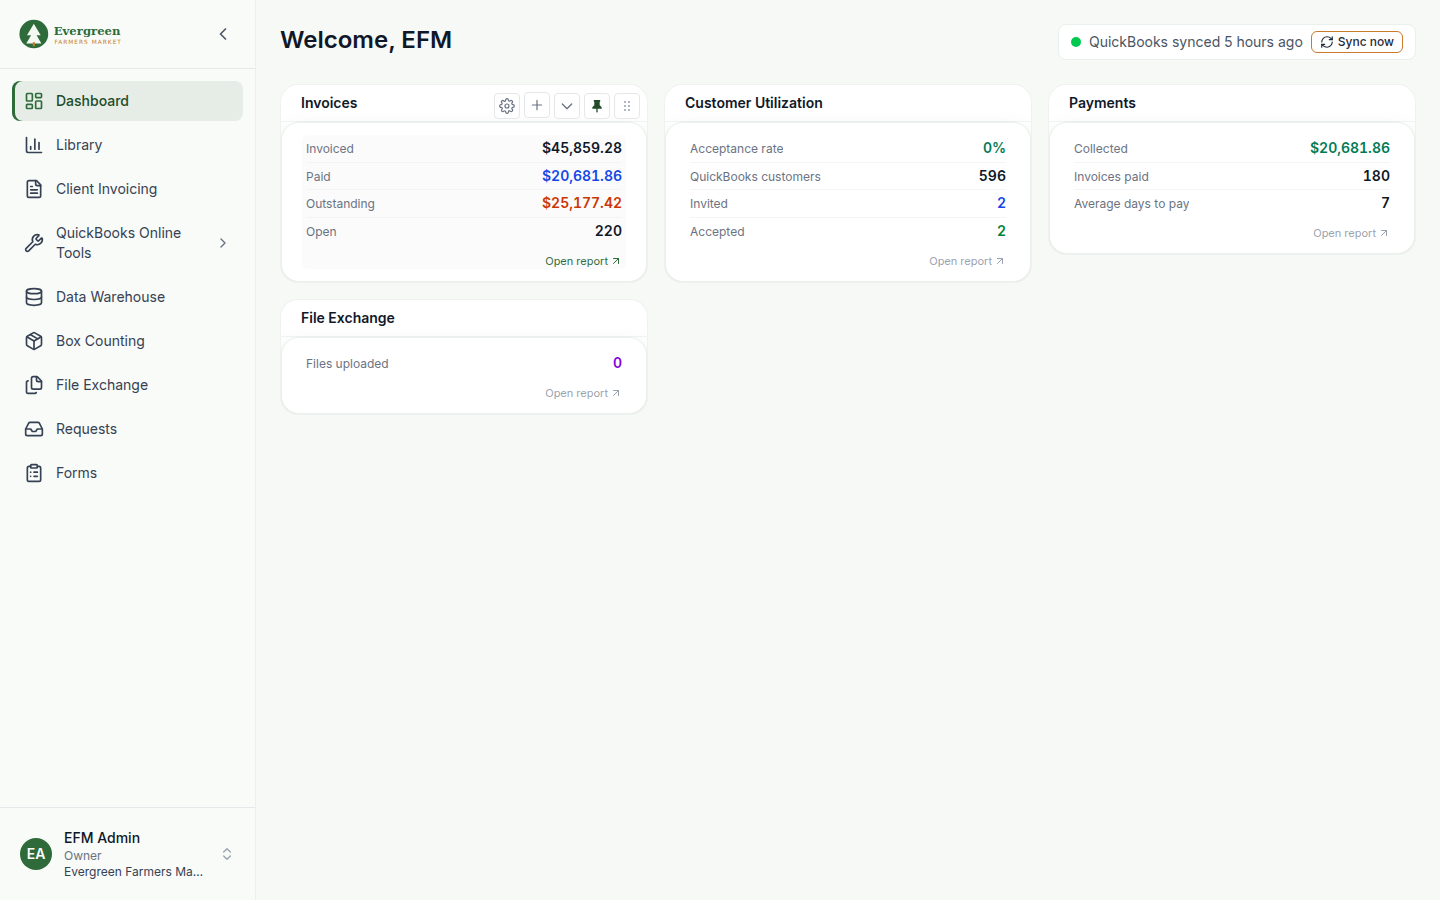
Your Dashboard is the first page you see after you sign in. It shows your QuickBooks status and the tiles and reports pinned for you. Each person on your team has their own dashboard.
Before you start
- You need the View Dashboard permission in your role to see the Dashboard in the menu.
- The QuickBooks status strip appears only for owners, admins and roles with a QuickBooks Tools permission (Sync QuickBooks, Import to QuickBooks or Export from QuickBooks). Its Sync now button needs Sync QuickBooks (owners and admins always have it).
What is on the dashboard
- The page title, which greets you by name.
- The QuickBooks status strip, at the top right. A green dot and QuickBooks synced 14 hours ago mean you are connected; hover the text for when each kind of sync last ran. Sync now refreshes customers, invoices and payments. An amber dot with QuickBooks needs reconnecting · Reconnect or a gray dot with QuickBooks not connected · Connect takes you to Settings → QuickBooks connection and sync, where connecting, reconnecting and disconnecting happen. The same strip appears on every page that works with QuickBooks. See How QuickBooks data syncs.
- Your pinned items. Tiles, charts and reports, laid out in a grid. On a phone they stack in one column.
Where your pinned items come from
ClientSynq picks what to show in this order:
- Your personal pins, once you have changed your dashboard.
- Your role's default pins, set by an admin on the Dashboard Widget Access page. A default pin can follow each person's home market.
- The four standard tiles: Invoices, Customer Utilization, Payments and File Exchange (File Exchange only on plans that include it).
The first time you reorder, unpin or pin something, ClientSynq copies what you see into your personal pins. From then on, changes to your role's defaults no longer change your dashboard.
Change your dashboard
Hover over a tile to show its controls in the top-right corner.
- Reorder: drag the dotted handle (Drag to reorder) and drop the tile where you want it.
- Unpin: select the pin icon (Unpin from dashboard).
- Collapse: select the arrow (Collapse) to shrink the tile to its title. Select it again to expand it.
- Change a tile's settings: select the gear icon (Tile settings (period and filters)). Changes apply to this copy of the tile only. Every tile has the same period picker: Week, Month, Quarter or Year, with arrows, and it opens on the last complete period, the one holding the last complete market day, so a tile never shows an empty current week.
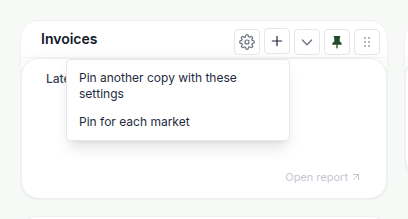
- Pin another copy: select the plus icon, then Pin another copy with these settings. Change the new copy's settings to show, for example, a different period.
- Pin one per market: select the plus icon, then Pin for each market. ClientSynq adds one copy for each market in your organization, named like "Occupancy · Market name".
Good to know
- Your changes save as you make them and affect only your own dashboard.
- To add reports or saved tiles, pin them from the Library (Enterprise plan). See Pin reports and save tiles.
- A pinned item you no longer have access to is hidden. It comes back if your access returns.
- If nothing is pinned, you see Nothing pinned to your dashboard yet with a link to the Library.
- After you finish checkout, the dashboard shows You're all set! once your subscription is active.