
ClientSynq connects to your QuickBooks Online company and gives your clients a portal where they can see their invoices and pay them online. Your team works in the customer portal; your clients use the client portal.
Before you start
- You need a QuickBooks Online company. ClientSynq reads your customers and invoices from it.
- To take online payments, you also need a QuickBooks Payments account. Payments go through QuickBooks Payments, not through ClientSynq.
- Every new organization starts with a free 14-day trial of the Pro plan. You do not need a card to start.
Set up in this order
- Start your trial. Sign up with your email or with your QuickBooks account. See Start your free trial.
- Accept the Terms. The first time you sign in, ClientSynq asks you to accept the Terms of Service and Privacy Policy. See Accept updated Terms.
- Connect QuickBooks. Select Connect in the QuickBooks status strip at the top right of your Dashboard, then Connect to QuickBooks on Settings → QuickBooks connection and sync. If you signed up with QuickBooks, this is already done. See Connect QuickBooks.
- Turn on online payments. Open Settings (under your name, bottom left), then Client Payment Settings, and choose which payment methods your clients can use. See Turn on online payments.
- Invite your clients. Go to Client Invoicing, select clients and send invitations. See Invite clients to your portal.
- Add your team and brand (Pro and Enterprise). Under Settings, invite team members from Team & Roles and add your logo and colors in Brand.
- Choose a plan before your trial ends. Under Settings, open Billing & Plans and add a card. See Plans and trials.
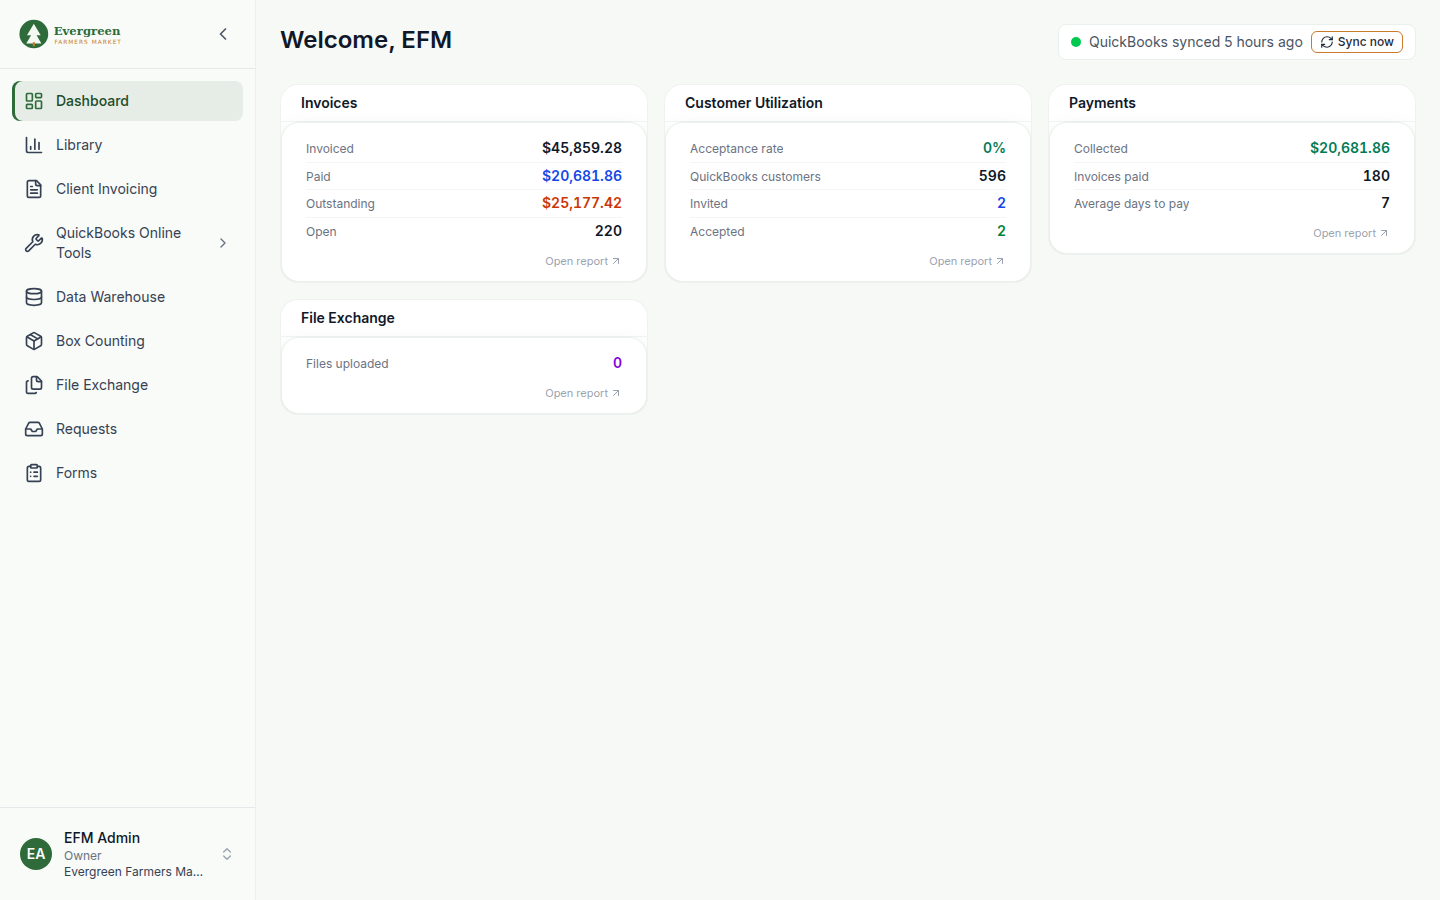
Find your way around
The menu on the left lists the pages you can use. What you see depends on your plan and on the permissions in your role.
| Menu item | What it is for |
|---|---|
| Dashboard | Your home page, with the QuickBooks status strip and your pinned tiles |
| Client Invoicing | Your QuickBooks customers, their balances and their portal invitations |
| QuickBooks Online Tools | A group that opens to Import, Batch Modify and Square Sales Import (the tools your plan and role include) |
| File Exchange | Files you share with clients (Pro and Enterprise) |
Enterprise organizations also see tools such as the Library, the Data Warehouse and the QuickBooks Online Tools.
The sidebar holds your working tools, under your organization's logo. Everything that configures your organization is under Settings: select the identity block at the bottom left of the sidebar (your initials, your name, your role and the organization you are in), then Settings. The same menu has Help, Sign out, and Switch organization when you belong to more than one. See Settings and the account menu.
| Settings card | What it is for |
|---|---|
| Brand | Logo, colors, fonts and client portal links (Pro and Enterprise) |
| Client Payment Settings | Payment methods and convenience fees for your clients |
| Billing & Plans | Your plan, your trial and your subscription |
| Team & Roles, Widget Access, Audit Log | Team members, roles, permissions, what each role sees, and who changed what (Pro and Enterprise) |
| QuickBooks connection and sync | Connect, reconnect, disconnect and sync QuickBooks |
Get help
Select the Help button in the lower-right corner of any page. It suggests articles for the page you are on and has a Contact Support link.