
By default, emails to your clients come from a shared ClientSynq address. With a custom sending domain they come from your own address, such as billing@yourcompany.com, with your name as the sender.
Before you start
- A custom sending domain is part of Enterprise white label.
- To open Brand Settings you need the Manage Branding permission. To register, verify or remove the domain you must be the owner, have the Administrator role, or have a role with Edit Settings (Roles page, Settings group).
- You need access to your domain's DNS settings, or someone who can add records for you.
- Pick the domain to send from. It can be your main domain or a subdomain such as
mail.yourcompany.com.
Register the domain
- Open Settings (under your name, bottom left of the sidebar), then Brand.
- Scroll to Custom Sending Domain.
- In Domain, enter the domain, for example
mail.yourcompany.com. - In Mailbox, enter the part before the @. The default is
billing. Use letters, digits, dots, hyphens and underscores only. - Click Register domain.
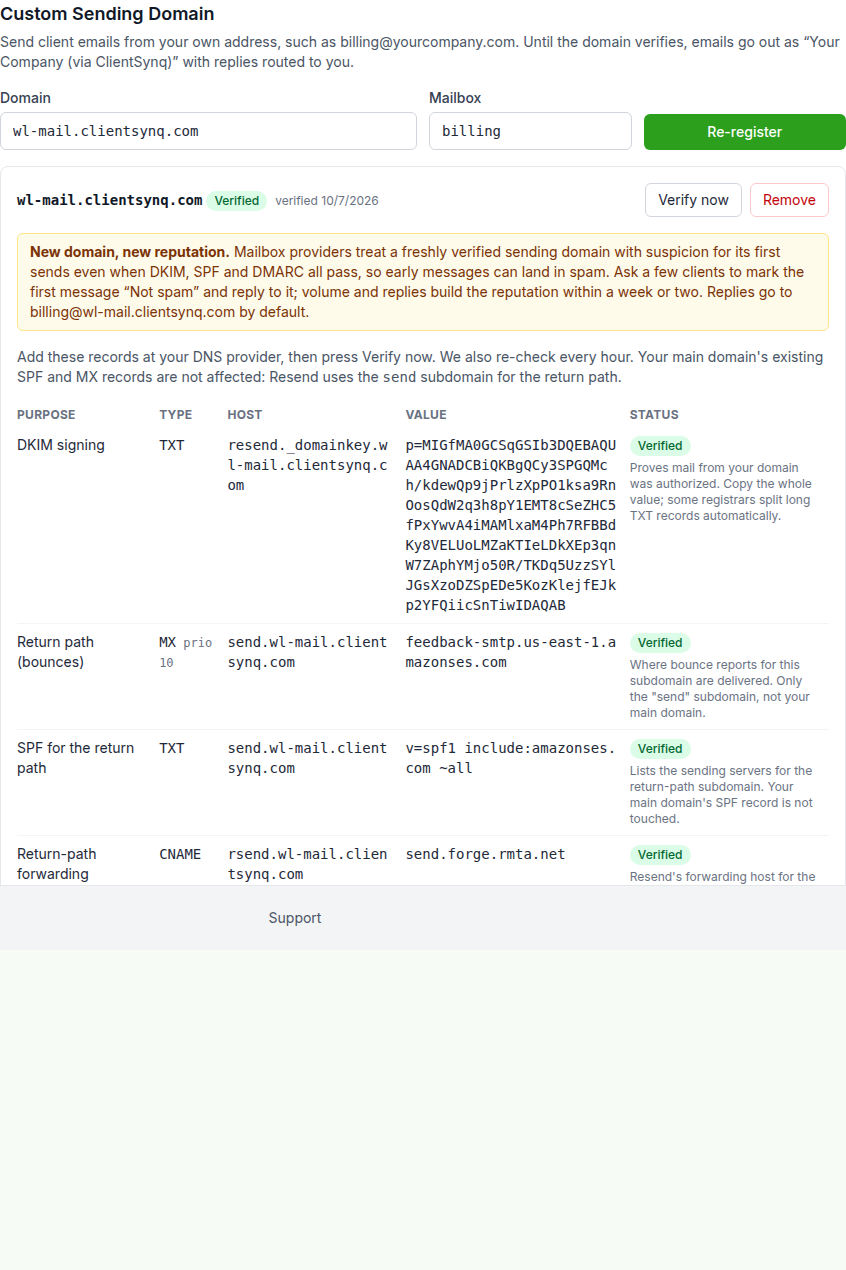
A table of DNS records appears, and the domain shows Waiting for DNS.
Add the DNS records
The table lists each record's Purpose, Type, Host, Value and Status. These are the records that sign your email (DKIM), authorize sending (SPF) and handle bounces (return path). Add each one at your DNS provider exactly as shown.
Your main domain's existing SPF and MX records are not affected. The return path uses the send subdomain.
The last row, DMARC (recommended), is marked Guidance. Add it only if your domain has no _dmarc record yet. If it already has one, leave it as is.
Verify
- After adding the records, click Verify now.
- Each record's status changes to Verified as it is found. When all are found, the domain shows Verified with the date.
You do not have to keep the page open. ClientSynq re-checks every hour, and every minute while the page is open. DNS changes can take a while to reach everyone, so if a record still shows Waiting for DNS, check it again later.
If something is wrong, an error appears under the table. Last checked shows when the domain was last checked.
Set the sender name and reply-to
Below the records:
- From display name: the name clients see as the sender. Leave it empty to use your organization's name.
- Reply-to: where client replies go.
Click Save sender settings. The line Client emails currently send as shows the exact sender in use right now.
Which emails use your domain
Once the domain is verified, these emails come from your address:
- client portal invitations
- payment receipts
- File Exchange emails when you share files with a client
- notices to a client when a bank transfer did not clear
Emails to your own team, such as team invitations, and emails from ClientSynq about your account still come from ClientSynq.
Before verification
Until the domain shows Verified, client emails go out as "Your company (via ClientSynq)" from a ClientSynq address. Replies go to the Reply-to address if you set one, otherwise to the owner's email.
After verification, replies go to the Reply-to address if you set one, otherwise to your sending address itself.
Good to know
- A newly verified domain has no sending history yet. Early messages can land in spam even when every record passes. The card suggests asking a few clients to mark the first message "Not spam" and reply to it.
- To change the domain, enter the new one and click Register domain. To register the same domain again, the button reads Re-register.
- Remove takes the domain off after you confirm. Client emails go back to the shared ClientSynq address.